
Cover photo by https://unsplash.com/@liammcgarry
Scenario
“After struggling to secure our secret strings for a long time, we finally figured out the solution to our problem: Make decompilation harder. It should now be impossible to figure out how our programs work!” - HTB challenge
Let’s begin
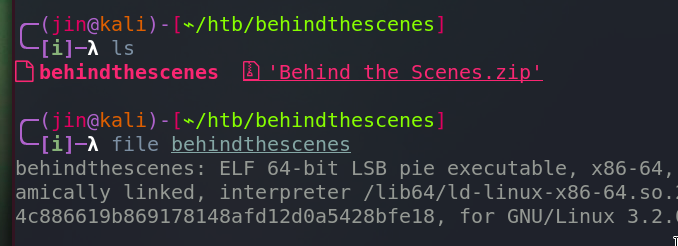
Extract the zip file, and we get a elf binary.
When executed
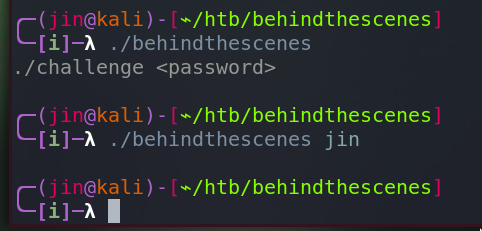
Giving a sample password does nothing. Tried to give a very long input to check bof, but nothing happened.
Time to disassemble.
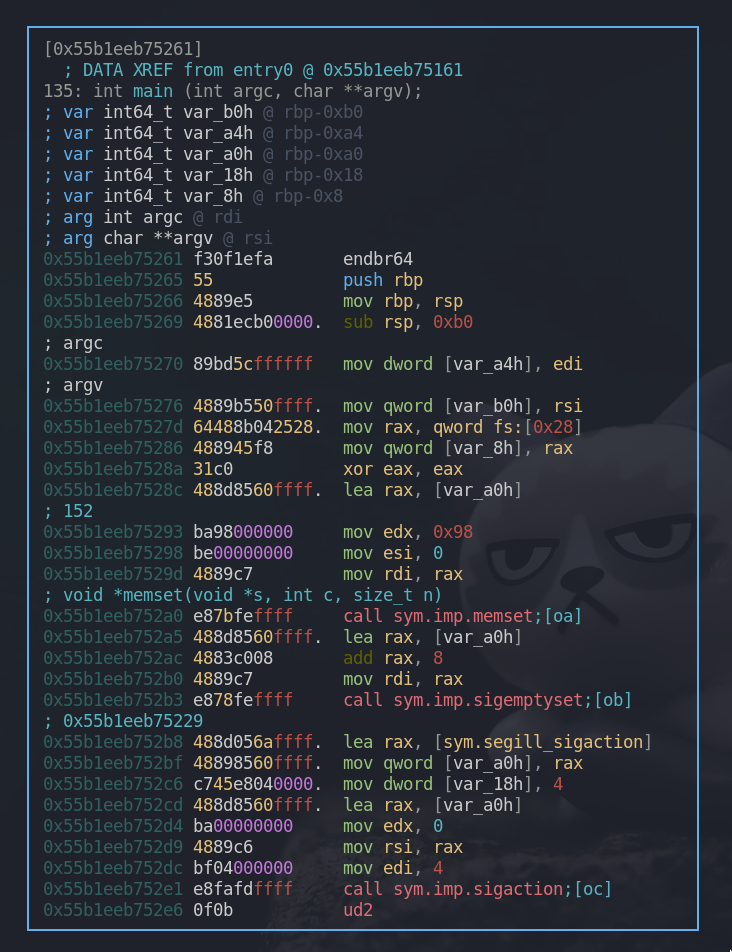
This is our main function. One uncommon thing that sticks out is that the function ends with “ud2” instead of “ret” or something.
However, when we check what’s after that ud2 at 0x55b1eeb752e6, we can verify that there are some more codes present in the main function which are not interpreted in the graph mode maybe because of the “ud2”.
It raises the undefined opcode exception and ends the program. Developers use this for various reasons. One example is to hide the code after ud2. Reverse engineering tools won’t automatically analyze what’s after this instruction, but it doesn’t mean that we can’t, because the codes are still there.
Radare2 graph view didn’t show us what’s after “ud2” because it doesn’t know whether those codes are going to be executed or not. When we are in the default view, it shows the interpreted instructions regardless.
Reload this binary with the write mode on radare2 and let’s remove all those ud2.
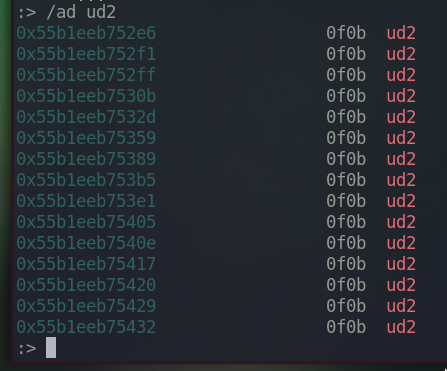
There are total 15 ud2 instructions.

Executed the following command 15 times.
|
|
What this does is that it navigates to the address where ud2 is, and writes two ’nop’ instructions. Two, because the length of ud2 opcode, 0f0b, is two bytes and we have to overwrite exactly the same length to make the program not crash.
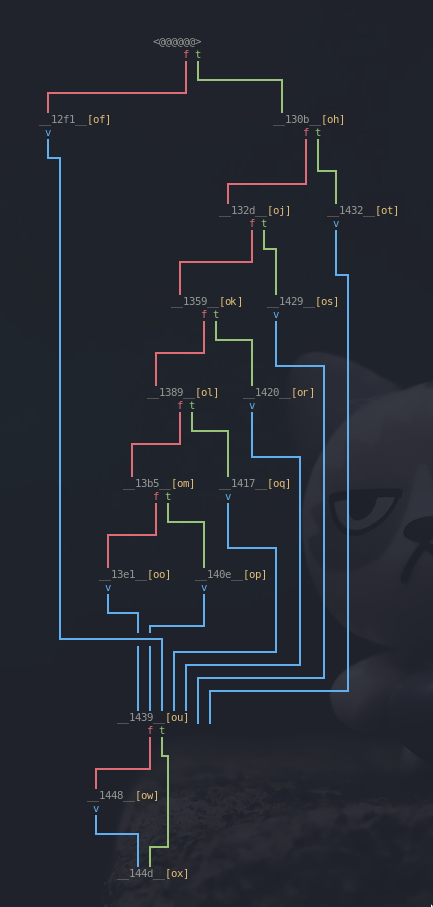
Coming back into the graph view, radare2 can now interprete the full flow of the program.
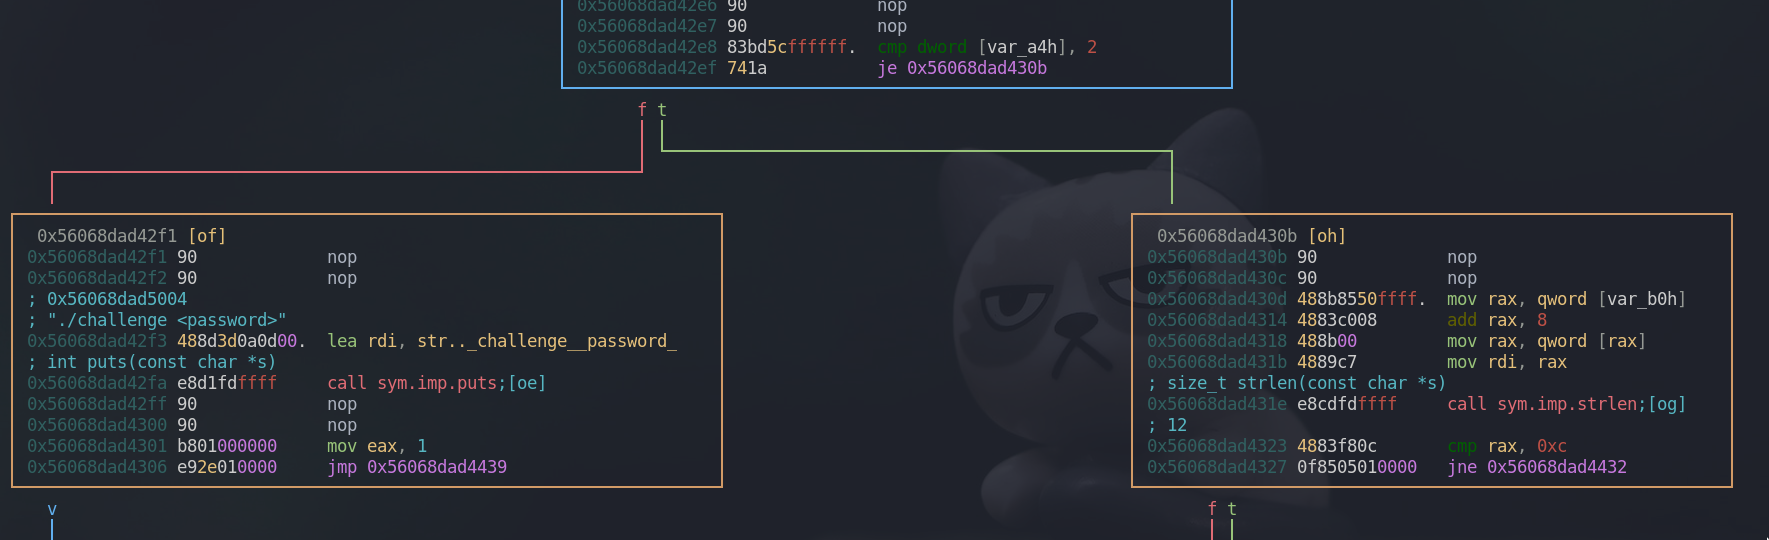
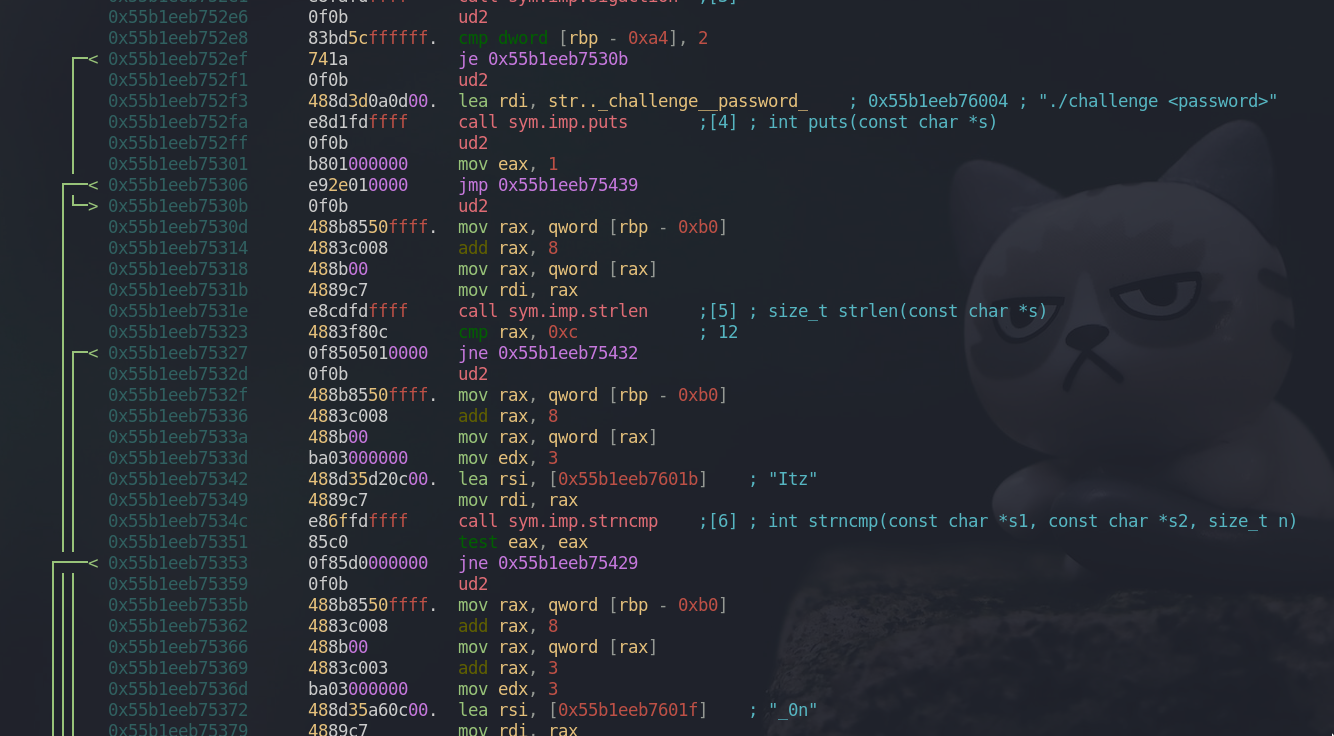
From our main function, cmp dword [var_a4h], 2 checks whether we provided the argument to the program. If no argument is provided, it goes to the left box, prints out “./challenge <password>” message and exits the program.
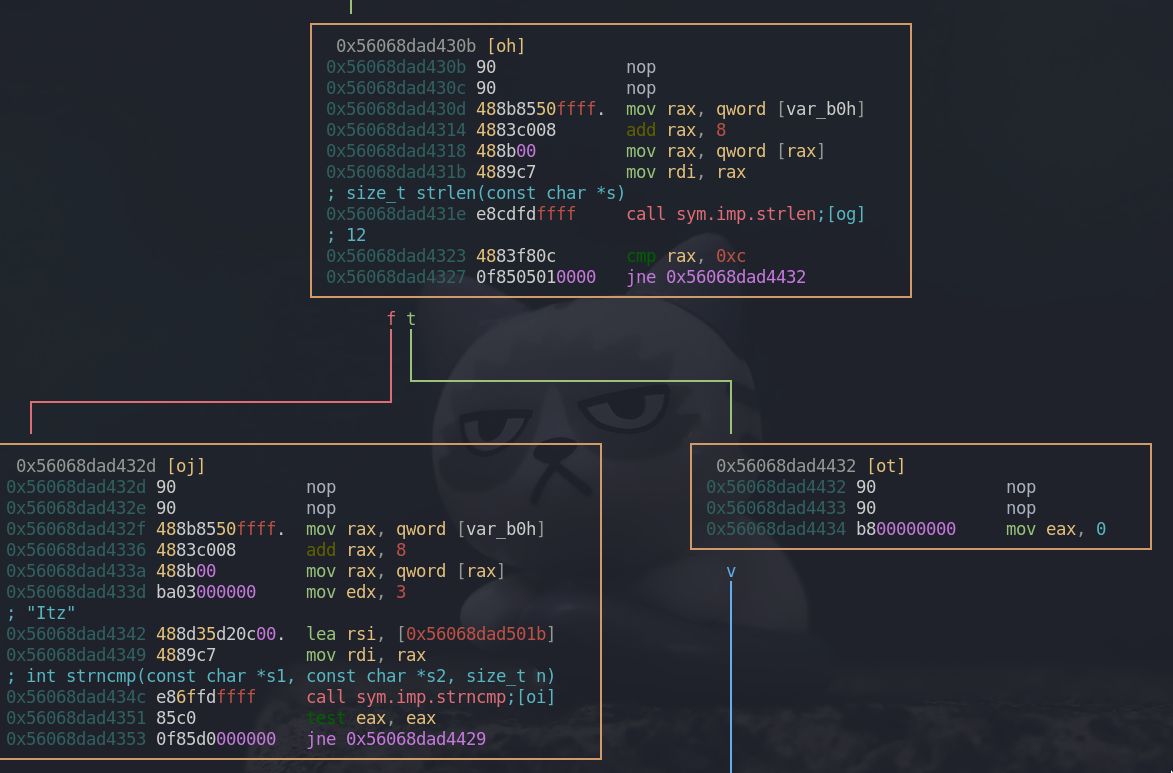
Now, we are on the right box. In here, cmp rax, 0xc checks whether our argument’s length is 12. If the length is not 12, it goes to the right box and exits the program.
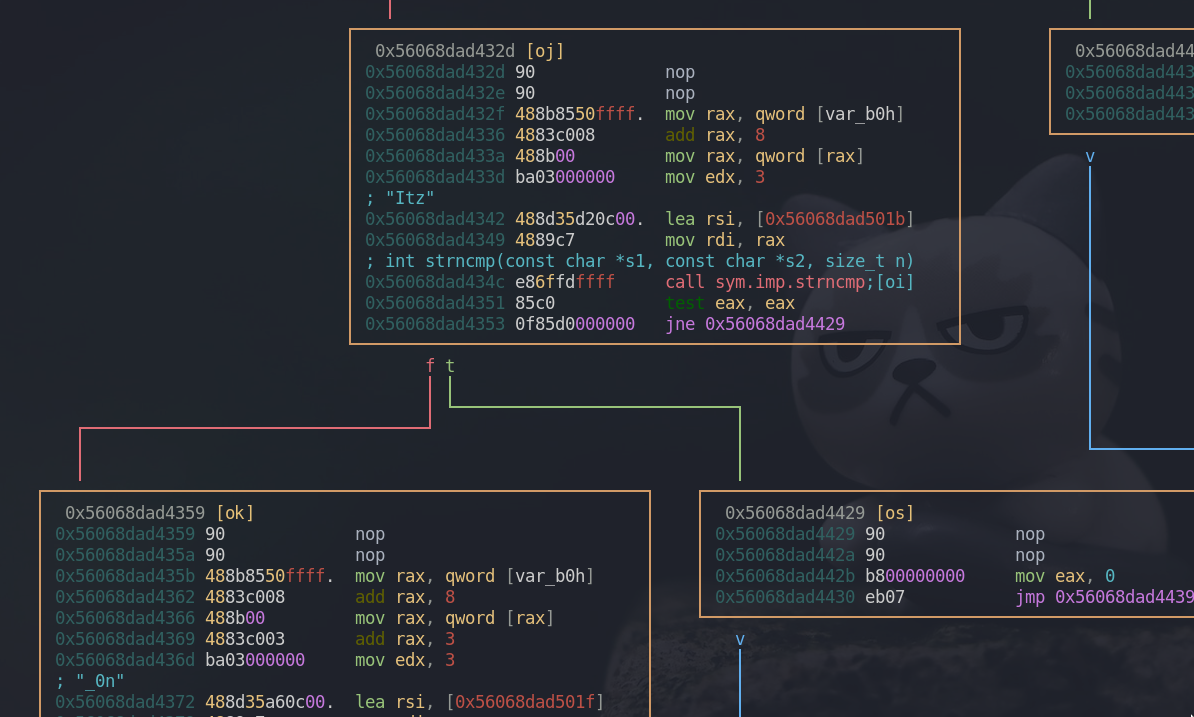
Let’s assume we provided the 12 character long argument and came to the left box. As we can see above, the first three bytes of our argument is being compared to the string “Itz”. If it matches, we will be sent to the left box. rax contains our string argument and the program loads three characters long string to rsi which will be compared against our argument. mov edx, 3 indicates that three bytes will be compared in the strncmp function. To translate it in python syntax, it’s like this rax[0:3] == rsi
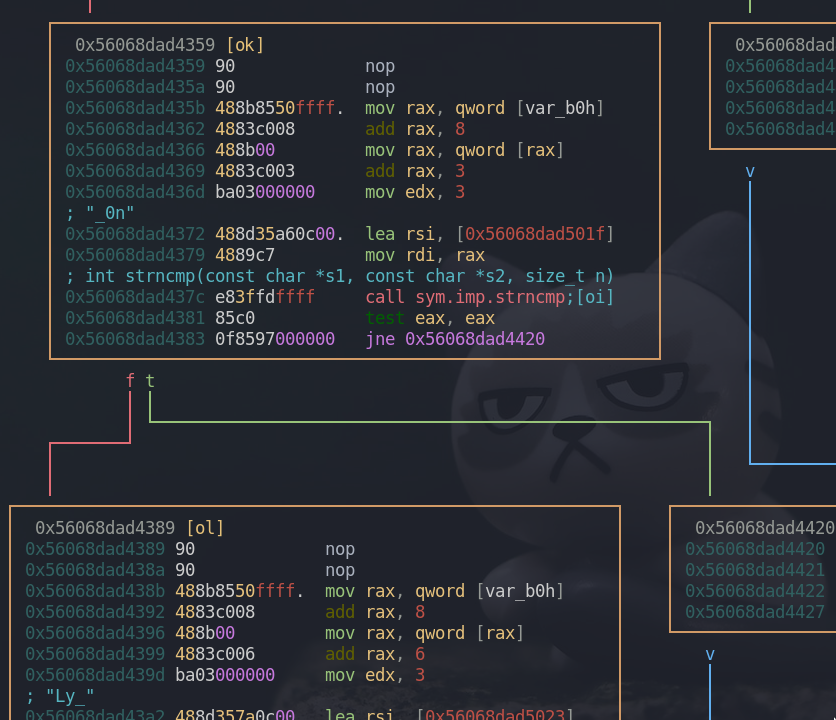
Again, the next three characters are being compared to the string “_0n”. The only difference is that add rax, 3 is added. This is how it compares next three bytes from our argument. rax[0+3:3+3] -> rax[3:6] == rsi
And it repeats.

We see add rax, 6, which indicates that the next three bytes from the previous one will be comapred to “Ly_”. rax[0+6:3+6] -> rax[6:9] == rsi
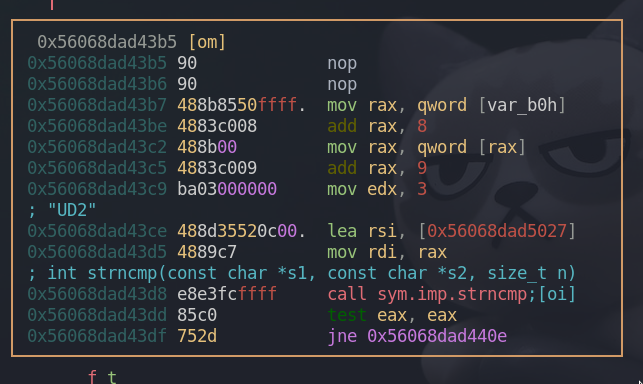
And the last one being compared, this box checks if our last three characters match “UD2”. rax[9:12] == rsi
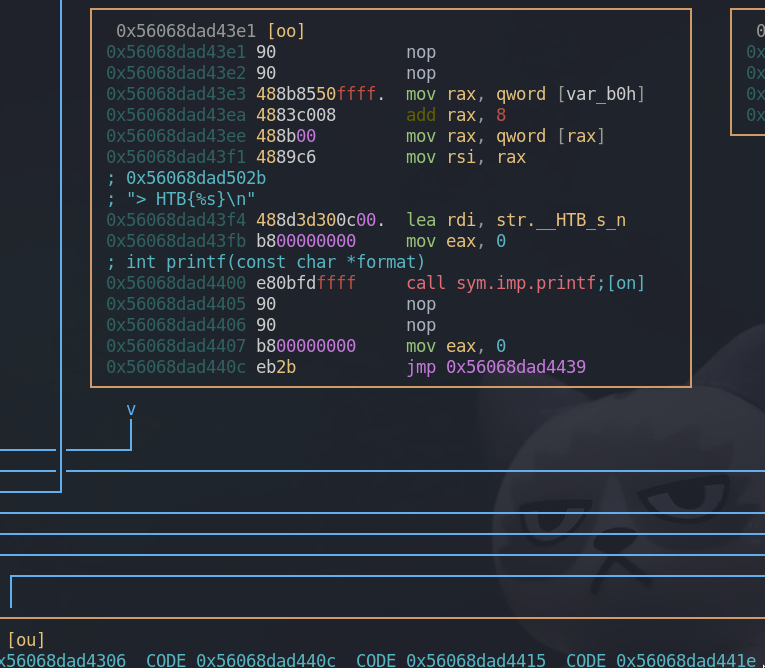
If we pass all the tests, we get a flag from this box and the flag is going to be our argument itself, rax. To sum up, the 12 bytes long string argument will be “Itz_0nly_UD2”.
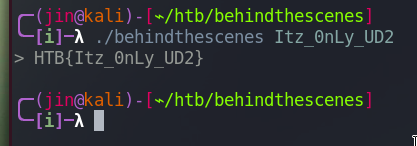
We got the flag.